Hakuouki: Demon of the Fleeting Blossom (PSP) on Emulator
This tutorial would be about playing a PSP platform copy of Hakuou Shinsengumi Kitan (which has been officially licensed by Aksys Games) on PC. I bought the game and played it on my PSP but nothing beats playing otome games in PC for me. Of course, one of my main reasons why I did this was to see a bigger Saito Hajime and Hijikata Toshizou on screen. I don't want to restrain myself on the small screen of PSP. . (Btw, I don't really like Okita Souji 'cuz he's such a yandere. That's just psychotic.)
We're all upset that Kazuki Yone (artist/goddess behind the Shinsengumi bishies) is not with Idea Factory (IF) anymore. For those who don't know the story, a long time ago, it seems like (we got nothing but rumors and it's the most reliable one I got. Anyone got a more realistic background, please share it with me, ne?)Yone asked for a pay raise since she's not an amateur artist. Heck, she raised two games (Hakuouki and Hiiro no Kakera) into anime world. Idea Factory is like, "No, gtfo.". As a result, we got bombarded with fake copies of her artwork. As if we, her loyal fans, would not notice. IF thinks that they can trick fans with making that "anonymous" artist do that copy-cat work. It's been so long since that and even now, they can't stop milking this series. IF can't be more shameful than that.
*One scenario in the world wide net worth ranting about*
Kazuki Yone: 「I drew something new and posted it in my blog! Please support Hakuouki!」
Idea Factory: 「STFU. You're no longer part of this company. We're suing you for drawing characters under copyright issues and for posting it without our permission.」
Total bs. As if she needs permission to draw what she designed and to post it on her blog. It's not like she's selling anything so why the paranoia, IF?
Well, it happened a long time ago and she's working on a new game now so rant's over. Here's the tutorial. Click the image for a bigger view. Just a tip: right click on the image + view link in another tab = undisturbed tutorial-viewing.
LET'S START WITH DOWNLOADING THE NEEDED FILES:
● Get your copy of PSP Emulator. JPCSP is the most famous and sanest emulator out there. (Not that I can speak since I don't really know psp emulators) Here's the web link and just click the version that's appropriate for your computer. Usually, you get the latest one. Here:
http://buildbot.orphis.net/jpcsp/
● If you want a fully voiced game, here's the voice plugin:
mono_ATRAC3PLUS_Autoplay_assistant_tool v1.9.28
● You need Sound Forge and Sonic Stage. Well, that's not for free. Actually, nothing in this world is really free. There are cracks and everything and it's easy to Google so you can do that yourself.
● Naturally, the most important file: the game itself. Due to complaints about piracy, I removed the link. Whatever.
PROCEEDING TO THE INSTALLATION AND THAT TROUBLESOME STUFF...
Sound Forge:
My copy is this one: Sony Sound Forge Pro v10.0c491_Keygen DI - by saoman
● Install Sound Forge first. You don't have to do any "installing" stuff with JPCSP but it's more troublesome with the configuration.


● Don't run it yet. Run Keygen > select Sound Forge 10 series > Patch. Be sure to copy the serial and activation code.

● Run Sound Forge 10 bugfix.reg

● Run Sound Forge > enter the serial > choose register from another computer > save the license anywhere and you can also delete it after > enter the activation code.
Sonic Stage:
● Just install this since you need it for your game to have sounds in jpcsp. There should be no problems here.

JPCSP (PSP Emulator):
● After extracting the file, you should get a folder with a name like jpcsp-windows... Inside that folder is another folder named umdimages. Copy the ISO file of Hakuouki.


● Go back to the original folder. You should see a Windows Batch File like start-windows-x86. At least that's what mine says. Double-click that and a new window should appear.


● Before you can play, we still have to set the configuration settings. Go to Options > Configuration or just click F12. This is a really complicated part since the settings will differ for everybody since we all have different computers. Despite the game not having high spec demands, jpcsp does. I screenshot my computer specs and the setting I have so you can confirm it for yourself. You have to experiment and I won't be able to answer problems regarding this thing since I don't know much.


● Go to File > Load UMD > Click Hakuouki > Run. The game should run fine. The video may lag a bit (though mine didn't) but don't worry since that's an accepted fact.


Game should work just fine with sound effects and bgm but no voices. If you're fine with that, then it's okay not to do the voice tool.
mono_ATRAC3PLUS_Autoplay_assistant_tool v1.9.28:
If you want to hear the seiyuus' hot voices...
● Extract the file. You should see an application file there. Seen it? Okay, good.

● Open this file. Click Start and it should turn into Virtual Desktop. Just minimize that while playing Hakuouki.

Read More →
We're all upset that Kazuki Yone (artist/goddess behind the Shinsengumi bishies) is not with Idea Factory (IF) anymore. For those who don't know the story, a long time ago, it seems like (we got nothing but rumors and it's the most reliable one I got. Anyone got a more realistic background, please share it with me, ne?)Yone asked for a pay raise since she's not an amateur artist. Heck, she raised two games (Hakuouki and Hiiro no Kakera) into anime world. Idea Factory is like, "No, gtfo.". As a result, we got bombarded with fake copies of her artwork. As if we, her loyal fans, would not notice. IF thinks that they can trick fans with making that "anonymous" artist do that copy-cat work. It's been so long since that and even now, they can't stop milking this series. IF can't be more shameful than that.
*One scenario in the world wide net worth ranting about*
Kazuki Yone: 「I drew something new and posted it in my blog! Please support Hakuouki!」
Idea Factory: 「STFU. You're no longer part of this company. We're suing you for drawing characters under copyright issues and for posting it without our permission.」
Total bs. As if she needs permission to draw what she designed and to post it on her blog. It's not like she's selling anything so why the paranoia, IF?
Well, it happened a long time ago and she's working on a new game now so rant's over. Here's the tutorial. Click the image for a bigger view. Just a tip: right click on the image + view link in another tab = undisturbed tutorial-viewing.
LET'S START WITH DOWNLOADING THE NEEDED FILES:
● Get your copy of PSP Emulator. JPCSP is the most famous and sanest emulator out there. (Not that I can speak since I don't really know psp emulators) Here's the web link and just click the version that's appropriate for your computer. Usually, you get the latest one. Here:
http://buildbot.orphis.net/jpcsp/
● If you want a fully voiced game, here's the voice plugin:
mono_ATRAC3PLUS_Autoplay_assistant_tool v1.9.28
● You need Sound Forge and Sonic Stage. Well, that's not for free. Actually, nothing in this world is really free. There are cracks and everything and it's easy to Google so you can do that yourself.
● Naturally, the most important file: the game itself. Due to complaints about piracy, I removed the link. Whatever.
PROCEEDING TO THE INSTALLATION AND THAT TROUBLESOME STUFF...
Sound Forge:
My copy is this one: Sony Sound Forge Pro v10.0c491_Keygen DI - by saoman
● Install Sound Forge first. You don't have to do any "installing" stuff with JPCSP but it's more troublesome with the configuration.

Win 7 ver tutorial. Somebody requested for an updated OS.
What? I really hate the recent OS. They make my life complicated.


And the biggest lie ever...

● Don't run it yet. Run Keygen > select Sound Forge 10 series > Patch. Be sure to copy the serial and activation code.

I hate that annoying bgm. You wait and hear. -__-
● Run Sound Forge 10 bugfix.reg

This should appear. That's it.
● Run Sound Forge > enter the serial > choose register from another computer > save the license anywhere and you can also delete it after > enter the activation code.
Sonic Stage:
● Just install this since you need it for your game to have sounds in jpcsp. There should be no problems here.

Well, I did mention that I don't really like Okita Souji but he's my wallpaper.
What can I do? He's hot. (>w<)b~
JPCSP (PSP Emulator):
● After extracting the file, you should get a folder with a name like jpcsp-windows... Inside that folder is another folder named umdimages. Copy the ISO file of Hakuouki.


Yes, 1.11 GB. Prepare for that.
● Go back to the original folder. You should see a Windows Batch File like start-windows-x86. At least that's what mine says. Double-click that and a new window should appear.


And another window which should serve as your "PSP".

Example of a "You're screwed" moments. If this appeared, there's something wrong and
I can never tell you what that is. I have limited jpcsp knowledge.
● Before you can play, we still have to set the configuration settings. Go to Options > Configuration or just click F12. This is a really complicated part since the settings will differ for everybody since we all have different computers. Despite the game not having high spec demands, jpcsp does. I screenshot my computer specs and the setting I have so you can confirm it for yourself. You have to experiment and I won't be able to answer problems regarding this thing since I don't know much.

Soooo sorry for my low-tech pc.


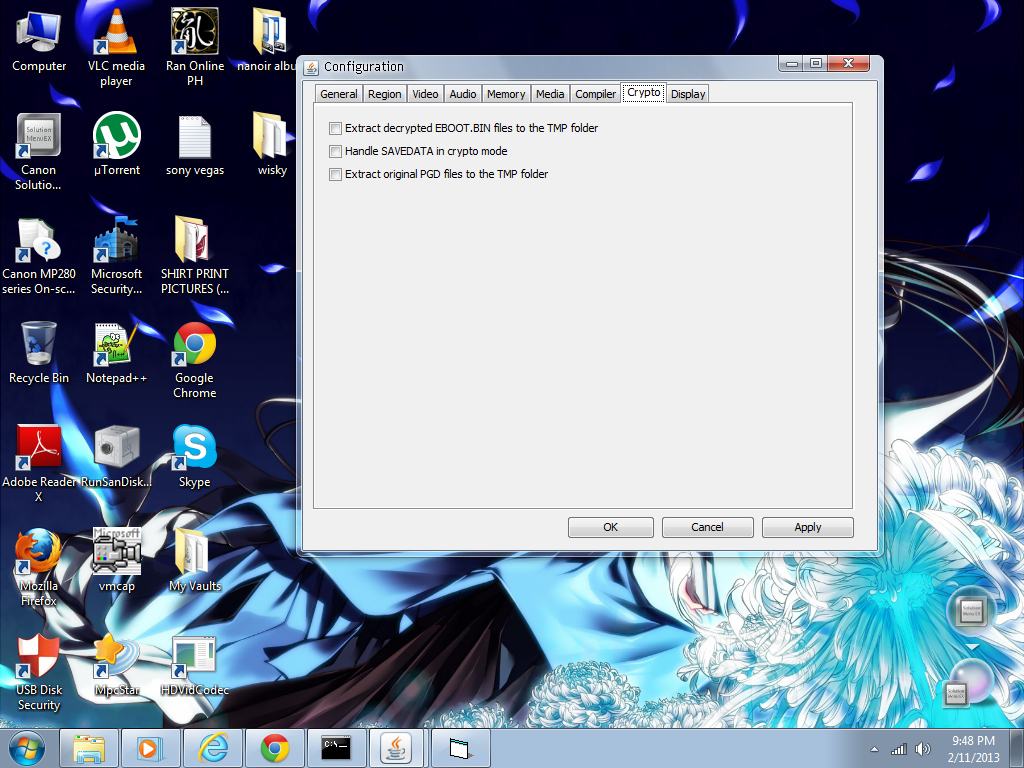

● Go to File > Load UMD > Click Hakuouki > Run. The game should run fine. The video may lag a bit (though mine didn't) but don't worry since that's an accepted fact.


Game should work just fine with sound effects and bgm but no voices. If you're fine with that, then it's okay not to do the voice tool.
mono_ATRAC3PLUS_Autoplay_assistant_tool v1.9.28:
If you want to hear the seiyuus' hot voices...
● Extract the file. You should see an application file there. Seen it? Okay, good.


OKAY, WE'RE DONE!
It's a tall order but it's worth it. Well, if you hate the hassle, just buy the game or download the ISO file and put it in your psp. For people like me who don't mind a little work for the sake of slightly bigger screen, this is recommended.
Read More →

Labels:
sasugasugoi,
Tutorial